使用 CacheManager + Redis集群方式 本地缓存不同步的问题
老师好, 目前遇到一个问题, 就是在使用Jetcache + redis cluster 集群模式的情况下, 缓存不同步的问题想问下老师:
我的配置(nacos + 本地):
spring:
  servlet:
    multipart:
      enabled: true
      max-file-size: 2MB
      max-request-size: 2MB
  main:
    allow-circular-references: true
    allow-bean-definition-overriding: true
  jackson:
    date-format: yyyy-MM-dd HH:mm:ss
    default-property-inclusion: non_null
    time-zone: GMT+8
    serialization:
      WRITE_DATES_AS_TIMESTAMPS: false
  data:
    redis:
      password: app-123456!qj
      cluster:
        nodes:
          - 192.168.9.210:7001
          - 192.168.9.210:7002
          - 192.168.9.210:7003
        max-redirects: 5
      timeout: 20000ms
      lettuce:
        pool:
          max-active: 20
          max-idle: 10
          min-idle: 2
          max-wait: 20000ms
        cluster:
          refresh:
            adaptive: true
            period: 30s

identify:
  secret-key: PIhqklxMNarWuqoNFFGJ5QGgesg==hkl1UBGlqopaKHKq9123h1
  access-token:
    expire-time: 604800
auth:
  template: jwt

# shortlink
shortlink:
  cache:
    stream:
      # 启用本地缓存Stream同步
      enabled: true
      # 消费者超时时间(毫秒)
      consumer-timeout: 2000
      # 批量处理大小
      batch-size: 10
      # 重试间隔(毫秒)
      retry-interval: 1000
      # 最大重试次数
      max-retries: 3
      cleanup-interval: 300000
  cluster:
    enable-read-write-split: false
    connection-timeout: 20000
    socket-timeout: 20000
  # 任务调度器线程池配置
  scheduler:
    threadpool:
      # 调度器线程池大小
      poolSize: 8
      # 线程名称前缀
      threadNamePrefix: scheduler-
      # 等待任务完成的超时时间
      awaitTerminationSeconds: 30
      # 关闭时等待任务完成
      waitForTasksToCompleteOnShutdown: true
  bloom:
    expected-insertions: 10000000
    false-probability: 0.01
    stream:
      enabled: true
      consumer-timeout: 2000
      batch-size: 10
    local:
      prewarm:
        # 本地时间片预热任务周期 (毫秒), 默认5分钟
        fixed-rate-ms: 300000
    # 时间分片配置
    time-slice:
      # 时间分片粒度(6小时)
      hours: 6
      # 本地布隆过滤器保留2天数据(2天 = 48小时 / 6小时 = 8个时间片)
      # 本地保留8个时间片(2天数据)
      local-keep-count: 8
      # Redis布隆过滤器保留8天数据(8天 = 192小时 / 6小时 = 32个时间片)
      # Redis保留32个时间片(8天数据)
      redis-keep-count: 32
  code:
    strategy: DISTRIBUTED_ID
    length: 10
    max-retries: 3
  machine-id: 1

spring:
  cloud:
    nacos:
      username: nacos
      password: nacos
      discovery:
        server-addr: 192.168.9.200:8848
        namespace: app-mico-service-dev
      config:
        import-check:
          enabled: false
        # 当前服务启动后去 nacos 中读取配置文件的后缀
        file-extension: yaml
        # 读取配置的 nacos 地址
        server-addr: 192.168.9.200:8848
        # 读取配置的 nacos 的名空间
        namespace: app-mico-service-dev
        refresh-enabled: true
    sentinel:
      transport:
        dashboard: localhost:9999
      eager: true
      enabled: true
      datasource:
        flow:
          nacos:
            server-addr: 192.168.9.200:8848
            # app-short-link-api-flow-rules
            dataId: ${spring.application.name}-flow-rules
            groupId: SENTINEL_GROUP
            dataType: json
            ruleType: flow
            namespace: app-mico-service-dev
            username: nacos
            password: nacos
        degrade:
          nacos:
            server-addr: 192.168.9.200:8848
            # app-short-link-api-degrade-rules
            dataId: ${spring.application.name}-degrade-rules
            groupId: SENTINEL_GROUP
            dataType: json
            ruleType: degrade
            namespace: app-mico-service-dev
            username: nacos
            password: nacos
  config:
    import:
      - optional:nacos:app-short-link-api.yaml

# 7901, 7911, 7921
server:
  port: 7911
  tomcat:
    uri-encoding: UTF-8
  servlet:
    context-path: /api

# 7999 7989 7979
dubbo:
  application:
    name: ${spring.application.name}
    qos-enable: false
  registry:
    address: nacos://192.168.9.200:8848?namespace=app-mico-service-dev&username=nacos&password=nacos
  protocol:
    name: dubbo
    port: 7989
    threadpool: fixed
    dispatcher: execution
    threads: 500
    accepts: 500
  provider:
    filter: globalDubboExceptionFilter

# jetcache
jetcache:
  ## 统计间隔, 单位分钟, 0 标识不统计
  statIntervalMinutes: 0
  ## 是否将areaName作为缓存key前缀, false更合理
  areaInCacheName: false
  ## 隐藏的包名前缀, 用于缩短自动生成的缓存名
  hiddenPackages: org.cy.micoservice.app.shortlink.api.service.impl
  ## 本地缓存配置
  local:
    default:
      # 本地缓存类型: linked-hashmap 或 caffeine (推荐)
      type: caffeine
      # 本地缓存最大元素数量
      limit: 100000
      # key转换器
      # other choose: fastjson/jackson
      keyConvertor: fastjson2
      # 本地缓存过期时间(毫秒), 15min
#      expireAfterWriteInMillis: 900000
  ## 远程缓存配置(Redis)
  remote:
    default:
      # 远程缓存客户端类型: jedis or lettuce(推荐), 单机: redis.lettuce, 集群: redis.lettuce.cluster
      type: redis.lettuce
      # key转换器
      # other choose: fastjson/fastjson2/jackson
      keyConvertor: fastjson2
      # 广播通道: 用于多节点缓存同步
      # 当缓存更新 / 删除时, 通过 Redis pub/sub 通知其他节点使本地缓存失效
      broadcastChannel: app-short-link-cache-sync
      ## 值编码器 (java / kryo / kryo5)
      # other choose: kryo/kryo5
      valueEncoder: java
      ## 值解码器
      # other choose: kryo/kryo5
      valueDecoder: java
      # 本地缓存过期时间(毫秒), 1 hour
      expireAfterWriteInMillis: 3600000
      mode: cluster
      # 连接池优化
      poolConfig:
        minIdle: 5
        maxIdle: 10
        maxTotal: 200
        maxWaitMillis: 2000
      maxAttempt: 5
      ## remote 缓存连接地址
      uri:
        - redis://:app-123456!qj@192.168.9.210:7001
        - redis://:app-123456!qj@192.168.9.210:7002
        - redis://:app-123456!qj@192.168.9.210:7003
Redis-Cluster 集群信息:
本地启动: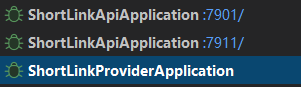
我的代码:
// 创建 CacheManager 的工厂
@Component
public class JetCacheFactory {

  @Autowired
  private ShortLinkCacheKeyBuilder cacheKeyBuilder;
  @Autowired
  private CacheManager cacheManager;

  public <K,V> Cache<K,V> createJetCache(String name,
                                         Duration localExpire,
                                         Duration remoteExpire,
                                         CacheType cacheType,
                                         int limit,
                                         boolean penetrationProtect,
                                         boolean cacheNullValue,
                                         boolean syncLocal
                                         ) {
    QuickConfig qc = QuickConfig.newBuilder(name)
      .localExpire(localExpire)
      .expire(remoteExpire)
      .cacheType(cacheType)
      .localLimit(limit)
      // 穿透保护
      .penetrationProtect(penetrationProtect)
      // .penetrationProtectTimeout()
      // 缓存 null 值
      .cacheNullValue(cacheNullValue)
      // 开启多节点同步
      .syncLocal(syncLocal)
      .build();
    return cacheManager.getOrCreateCache(qc);
  }
}

// 实例化对象
@Configuration
public class JetCacheConfig {

  public static final Duration TEST_EXPIRE_TIME = Duration.ofMillis(5000);
  public static final Duration LOCAL_EXPIRE_TIME = Duration.ofMinutes(45);
  public static final Duration DEFAULT_EXPIRE_TIME = Duration.ofHours(1);
  public static final Duration HOT_DATA_EXPIRE_TIME = Duration.ofHours(24);
  public static final Duration COUNT_EXPIRE_TIME = Duration.ofDays(7);

  @Autowired
  private ShortLinkCacheKeyBuilder cacheKeyBuilder;

  /**
   * short url cache
   * @param factory
   * @return
   */
  @Bean
  public Cache<String, ShortUrlMapping> shortUrlCache(JetCacheFactory factory) {
    return factory.createJetCache(
      cacheKeyBuilder.buildUrlCacheKey(),
      LOCAL_EXPIRE_TIME,
      DEFAULT_EXPIRE_TIME.plusMillis(ThreadLocalRandom.current().nextInt(30)),
      CacheType.BOTH,
      10000,
      true,
      true,
      true);
  }
}

// 业务代码使用:
  @Autowired
  private Cache<String, ShortUrlMapping> shortUrlCache;

  @SentinelResource(
    value = "databaseQuery",
    blockHandler = "databaseQueryBlockHandler",
    fallback = "databaseQueryFallback"
  )
  @Override
  public ShortUrlMapping getShortUrlWithSentinel(String shortCode) {
    return shortUrlCache.computeIfAbsent(shortCode, key -> {
      try {
        RpcResponse<CreateShortUrlRespDTO> response = shortUrlFacade.findByShortCode(key);
        if (response.getData() == null) {
          return null;
        }
        ShortUrlMapping mapping = BeanCopyUtils.convert(response.getData(), ShortUrlMapping.class);
        log.debug("DB加载成功 shortCode={}", key);
        return mapping;
      } catch (Exception e) {
        log.error("数据库查询失败 shortCode={}", key, e);
        throw new RuntimeException(e);
      }
    });
  }
先使用7901的端口进行查询, 然后数据正常写入Redis集群, 然后将redis中的数据删掉, 验证 7911 能否同步本地缓存, 结果还是将请求打到了DB上, 想问下老师大概是什么原因?谢谢~~
5
收起
正在回答 回答被采纳积分+1
1回答

相似问题


登录后可查看更多问答,登录/注册
Java+大数据+AI架构师实战营
- 参与学习 106 人
- 解答问题 128 个
专为1–5年开发者,打造极具竞争力的人才培养方案,快速突破技术/职业瓶颈 “三高”架构托底,海量数据吞吐,实时计算,AI驱动及智能化开发 大型 “社交+电商” 平台从0到1全程贯穿,高复杂架构落地
了解课程

恭喜解决一个难题,获得1积分~
来为老师/同学的回答评分吧
0 星