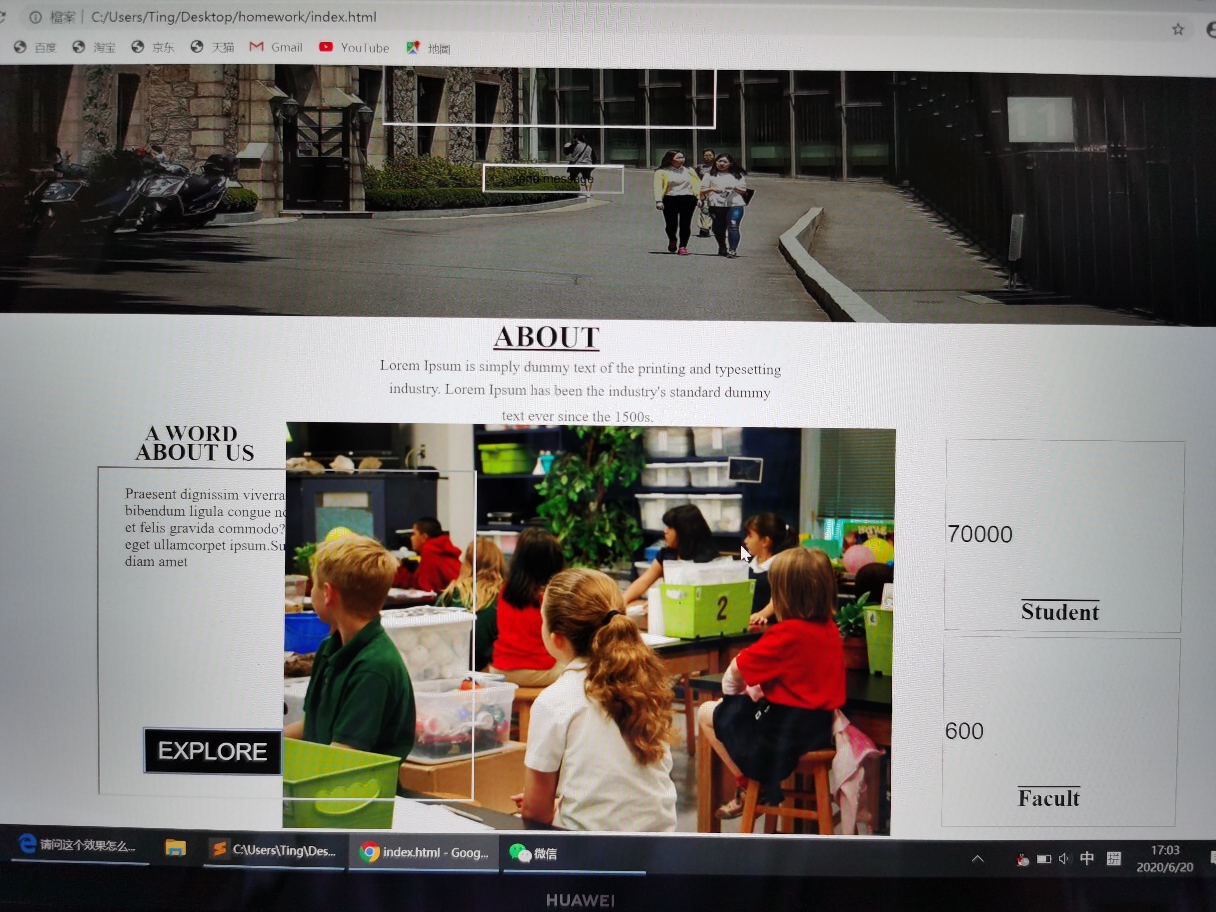
老师如何让文字也能在图片上显示,下划线怎么移动位置,文本框里的文字如何移动

<!DOCTYPE html>
<html>
<head>
<meta charset="UTF-8">
<title></title>
<link rel="stylesheet" type="text/css" href="css/index.css">
<script type="text/javascript" src="js/index.js"></script>
</head>
<body>
<div class="header">
<div class="logo">
< img src="images\logo.png">
</div>
<div class="auth">
<ul>
<li><a href=" ">HOME</a ></li>
<li><a href="#">ABOUT</a ></li>
<li><a href="#">GALLERY</a ></li>
<li><a href="#">FACULTY</a ></li>
<li><a href="#">EVENTS</a ></li>
<li><a href="#">CONTACT</a ></li>
</ul>
</div>
</div>
<div class="banner">
<div class="logo2">
< img src="images\banner3.jpg" class="banner-img">
</div>
<div class="form">
<form>
<p><input type="text" clase="test" value="your Name" id="s1"></p >
<p><input type="text" class="test" value="your Phone" id="s2"></p >
<p><input type="text" class="test" value="your Email" id="s3"></p >
<p><input type="text" class="test" value="Write Your Comment Here" id="s4"></p >
<button type="button" class="test" id="s5" >send message</button>
</form>
</div>
</div>
<div class="ABOUT">
<div class="title">
<h1 class="h1">ABOUT</h1>
<p class="p1">Lorem Ipsum is simply dummy text of the printing and typesetting</p >
<p class="p2">industry. Lorem Ipsum has been the industry's standard dummy</p >
<p class="p3">text ever since the 1500s.</p >
<h2 class="h2">A WORD</h2>
<h3 class="h3">ABOUT US</h3>
<p class="p4">Praesent dignissim viverra est,sed<br> bibendum ligula congue non.Sed ac nisl<br>et felis gravida commodo?Suspendisse<br> eget ullamcorpet ipsum.Suspendisse<br> diam amet</p >
</div>
<div class="logo3">
< img src="images\bb3.jpg" classs="ABOUT-img">
</div>
<div class="form2">
<form>
<input type="test" name="" class="text1" >
*{
padding: 0px;
margin: 0px;
}
.header{
height: 50px;
background-color: #07cbc9;
}
.header .logo {
margin-left: 120px;
float: left;
}
.header .auth{
float: right;
position: relative;
margin-right: 60px;
}
.header .auth ul li{
height: 50px;
list-style-type: none;
float: left;
margin-right: 15px;
font-size: 15px;
line-height:50px;
font-weight: bold;
}
.header .auth ul li a{
color: #ffffff;
text-decoration:none;
}
.header .auth ul li:hover{
background-color: #000;
}
.banner .logo2{
border: 0px;
height: 500px;
width: 100%;
font-size: 0px;
float: left;
}
.banner{
position: absolute;
margin-top: 0px;
float: right;
width: 100%;
height: 500px;
}
.banner .form{
text-align:center;
}
.banner input{
width:350px;
height:20px;
background-color: transparent;
}
.banner p{
padding-top: 15px;
}
.banner button{
margin-top: 40px;
margin-left: 10px;
height: 30px;
width:150px;
background-color: transparent;
}
/*最后一个p元素*/
p:last-of-type input{
height: 150px;
}
.head .img{
float: left;
position: absolute;
margin-left: 0px;
margin-top: 60px;
}
.banner img{
width: 100%;
height: 500px;
}
.banner .form{
float: left;
position: absolute;
margin-left: 500px;
margin-top: 10px;
}
.banner .logo2{
float: left;
}
.banner .text:hover{
border:2px solid #07cbc9;
}
.banner button:hover{
background-color: #07cbc9;
}
.ABOUT{
position: absolute;
margin-top: 500px;
}
.ABOUT .h1{
margin-left: 620px;
text-decoration: underline;
}
.ABOUT .h2{
position: absolute;
margin-top:0px;
margin-left: 250px;
}
.ABOUT .h3{
position: absolute;
margin-top: 20px;
margin-left: 240px;
font-size: 25px;
}
.ABOUT .p1{
position: relative;
margin-top: 5px;
margin-left: 500px;
}
.ABOUT .p2{
position: relative;
margin-top: 7px;
margin-left: 510px;
}
.ABOUT .p3{
position: relative;
margin-top: 9px;
margin-left: 630px;
}
.ABOUT .p4{
position:absolute;
margin-top: 70px;
margin-left: 230px;
}
.ABOUT .logo3{
margin-left: 400px;
position: absolute;
}
.ABOUT
正在回答
同学你好,下划线建议单独设置,可以参考如下代码:
设置标签:
<label class="line"></label>
设置样式:
label.line{
    background-color:#07cbc9;
    display:block;
    width: 40px;
    height: 2px;
    margin:15px auto;
}
同学说的文本框中的内容是指如下吗?可以通过margin ,padding或者定位设置位置。

祝:学习愉快~
- 参与学习 人
- 提交作业 676 份
- 解答问题 9666 个
本阶段将从前端网页搭建入手,到Java Web基础,前后端结合助你完成Java Web小白的蜕变!
了解课程


恭喜解决一个难题,获得1积分~
来为老师/同学的回答评分吧
0 星